Hot days are gone and the average temperature, where I live in North Carolina, is in the low 70s with much cooler evenings. This means it is time to change our outdoor space from summer to fall. This can be achieved by adding some decorative touches, but mostly by adding a heat source so no one gets chilly while we hangout. Here are a few options:
Firepit
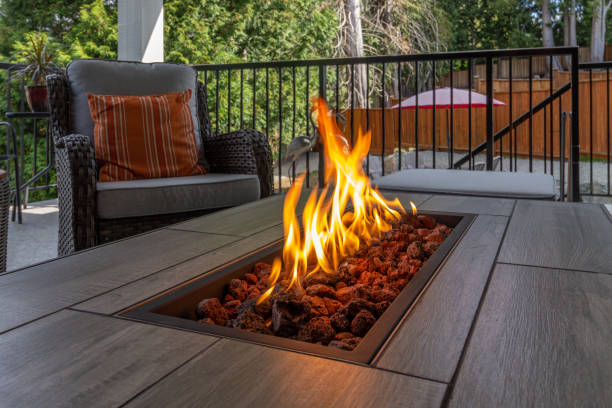
Wood-burning firepits are popular, for some there is nothing like the smell of burning wood on a cool evening. However, I’m not a fan of building a fire and all the cleanup that follows – so for me, I love a gas fireplace table. There are numerous types of firepits, choose the one that suits you best and enjoy.
Patio Heater
When it gets even more chilly through the season, use a patio heater. These can be either gas or electric and vary in size. I love when a restaurant has them and you can enjoy a cozy night with friends over drinks and charceuterie.
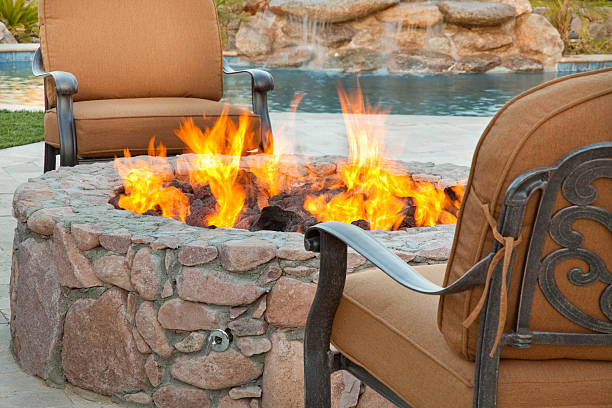
Outdoor Fireplace
You can have a custom fireplace built in your outdoor space. These fireplaces are much larger than firepits and can warm a large area. The only drawback, for me, is it is there all year long. Unlike a gas fireplace table that is smaller, decorative and gives off some heat, I can’t see many using a wood burning fireplace on those hot July nights.
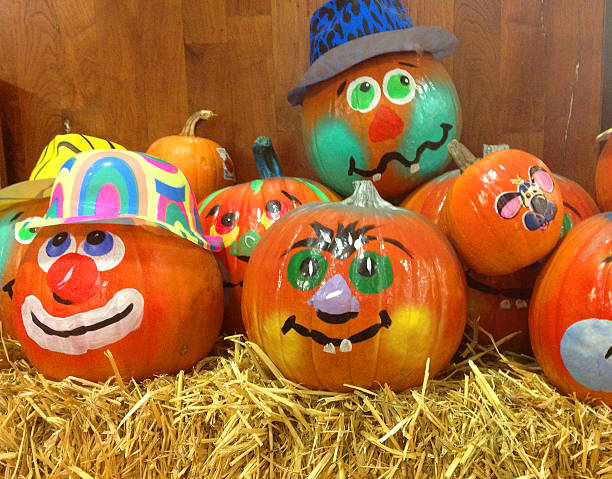
Painted pumpkins are the complete package! They have style, provide enjoyment for all ages, require no carving skills, and there are no slimy pumpkin innards involved.
Here’s what you will need:
Pumpkins, real or artificial, whatever size, shape or color you prefer.
Acrylic paint – choose colors you love.
Sharpee markers.
Painter’s tape.
Assorted painting tools like brushes, sponges, and don’t forget fingers are great tools too.
Something to put the paint on – paper plates work great.
Don’t skip coveringt the table. You can use a plastic tablecloth, craft paper, newspaper or whatever.
There are some trends that go away, as they should; then there are those that turn into classics. I’m so glad charcuterie wasn’t just a trend, but stood the test of time, and is now a classic.
Choosing the serving piece for your ample treat is up to your personal style. I use a beautiful oversized white rectangle glass plate with slight edges and a swirl of silver through the middle. If I don’t feel like digging out the plate, then I use one of our cutting boards, and it is just as tasty and delightful.
For accessories I have a few cheese knives, appetizer forks and spoons along with some small bowls to hold some of the yummy additions to the board like jams, dips, olives and more.
Now that you know what to place it all on, what will you include?
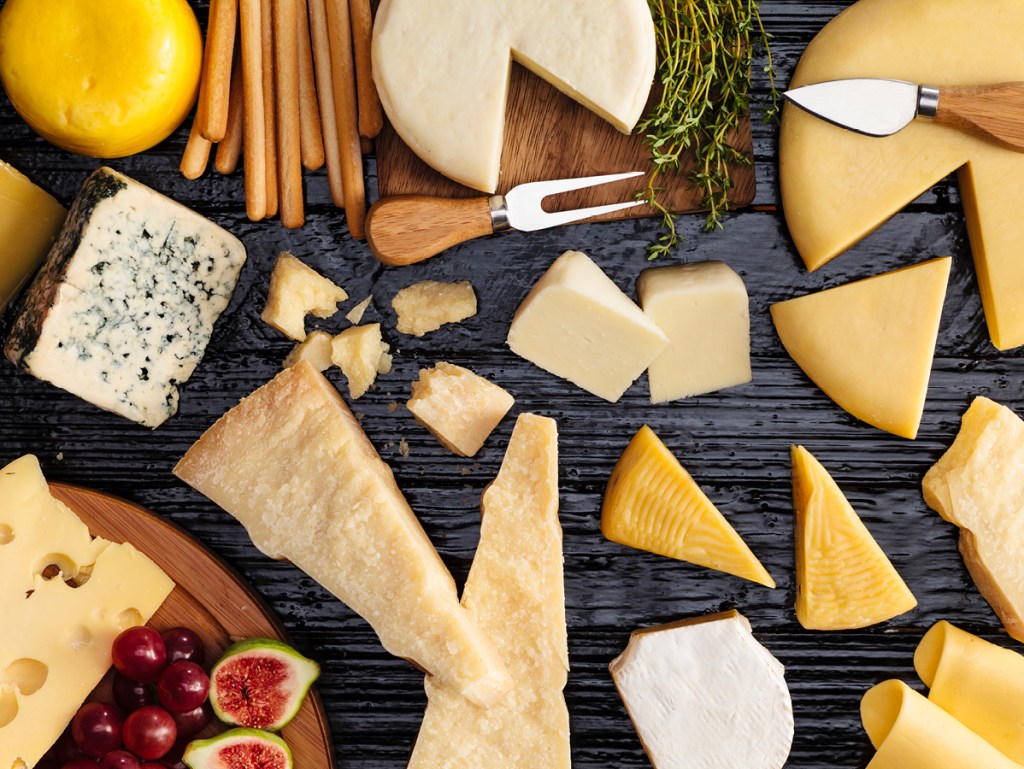
#1 – Cheese
The centerpiece of my board will be the selection of cheeses. I think high quality cheeses are best and should vary from soft to hard. When using hard cheeses I slice them, and add the softer cheese as a block so they can be cut right on the board with one of the provided knives. I begin with a foundation cheese like provolone, white cheddar or Gouda. Then I include spreadable soft varieties such as burrata and brie. Plus there are those that crumble well like goat and bleu.
#2 – Meats
Having a mix of meats is just as important as cheeses. In our home we love prosciutto, capicola, and sopressata. We do have friends who are vegan and/or vegetarian and when sharing a board with them we skip the meat, or I’ll make two separate smaller boards so Dean can have his sopressata.
#3 – Accents
For me, this is the fun part of the board. This is where I get to shop for those little touches that add that extra something. I do have some items that always show up like Maille Cornichons (my fave), and St. Dalfour Royal Fig Fruit Spread (another fave). I then like to hit the olive bar at the grocery to get various olives, stuffed peppers and marinated artichoke hearts. Then I need to round out these salty briny treats with some sweet. For the sweet I like fresh grapes, berries, apple slices, carrot sticks or even dried fruits like cranberries, cherries or apricots.
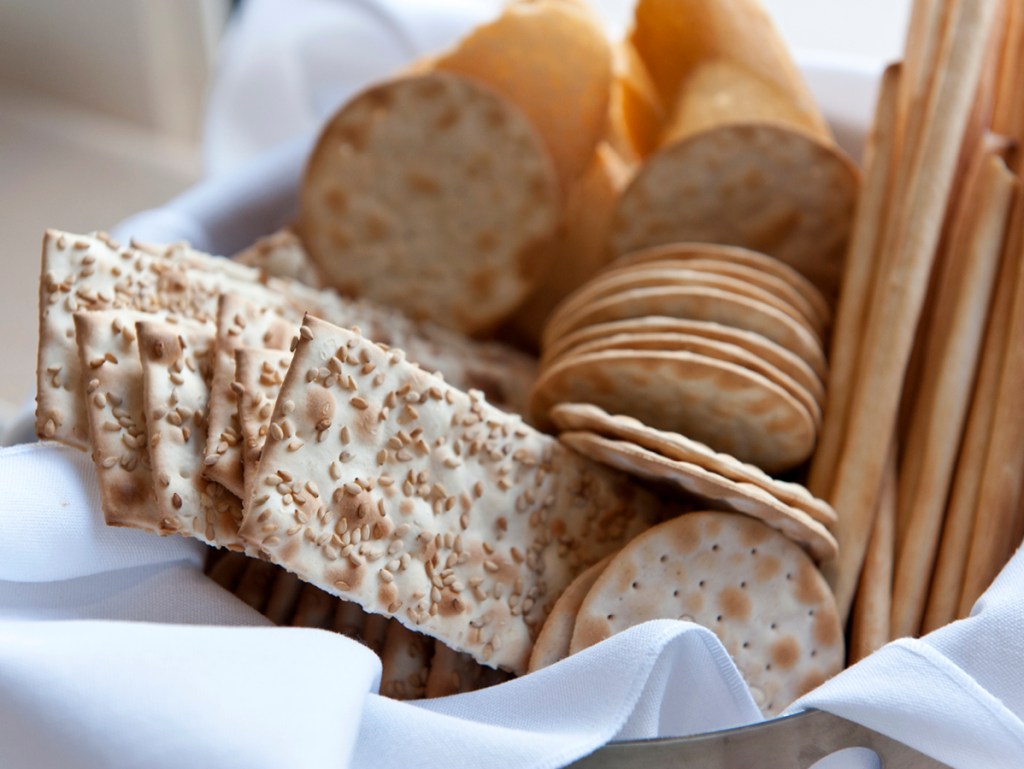
Don’t forget to add a mustard, hummus or other dips to give options. Then finish the ingredients with an artisan bread, thin grain crackers and even plain crackers. Charceuterie is whatever you want it to be, so play around with jams, chutneys and dips. Just don’t overload the board with too many options when two or three of each will do just fine.
#4 – Assembly
When you see an a charcuterie board online, most look like they were put together by an expert, but assembling your own is actually easier than you think. Watch some helpful videos or just jump in and go fot it and let your food muse guide you.
I find it works best if I start by placing the large food items on the board. This will include some of the cheese and meat selections. It may also include the bread, depending on what kind you chose. Next, arrange your bowls of olives, pickles, jams and dips. Then, neatly add anything that’s sliced, rolled, or folded. Once all the bigger items are placed, finish by filling the other spaces with the accents, including the crackers. You can also add grape leaves, sprigs of herbs like rosemary to just do some finishing touches. Your board, your choice!
You will notice I did not include nuts because so many have nut allergies, but feel free to add them to yours if you are good with them.